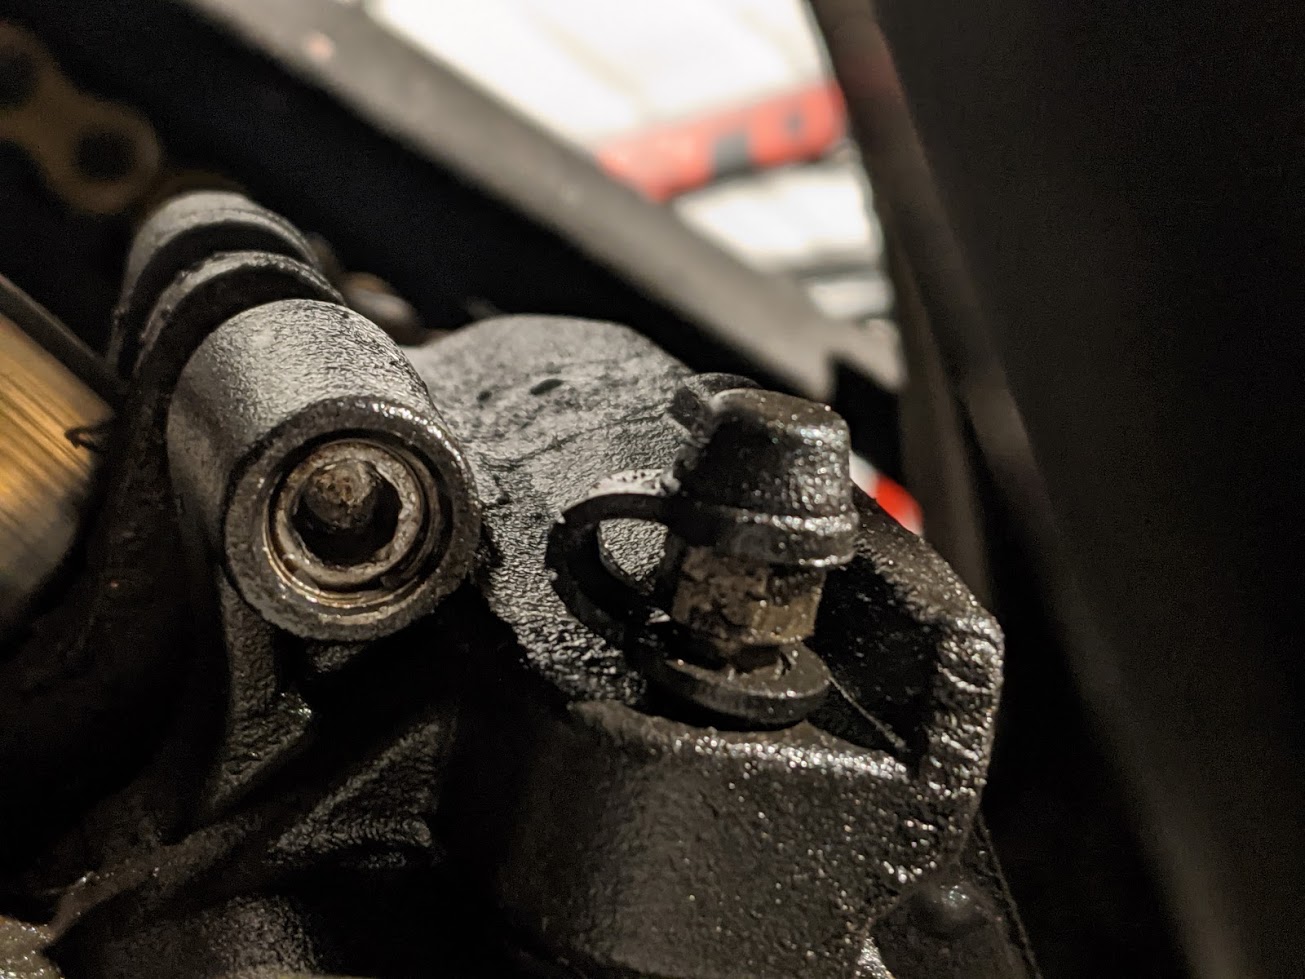
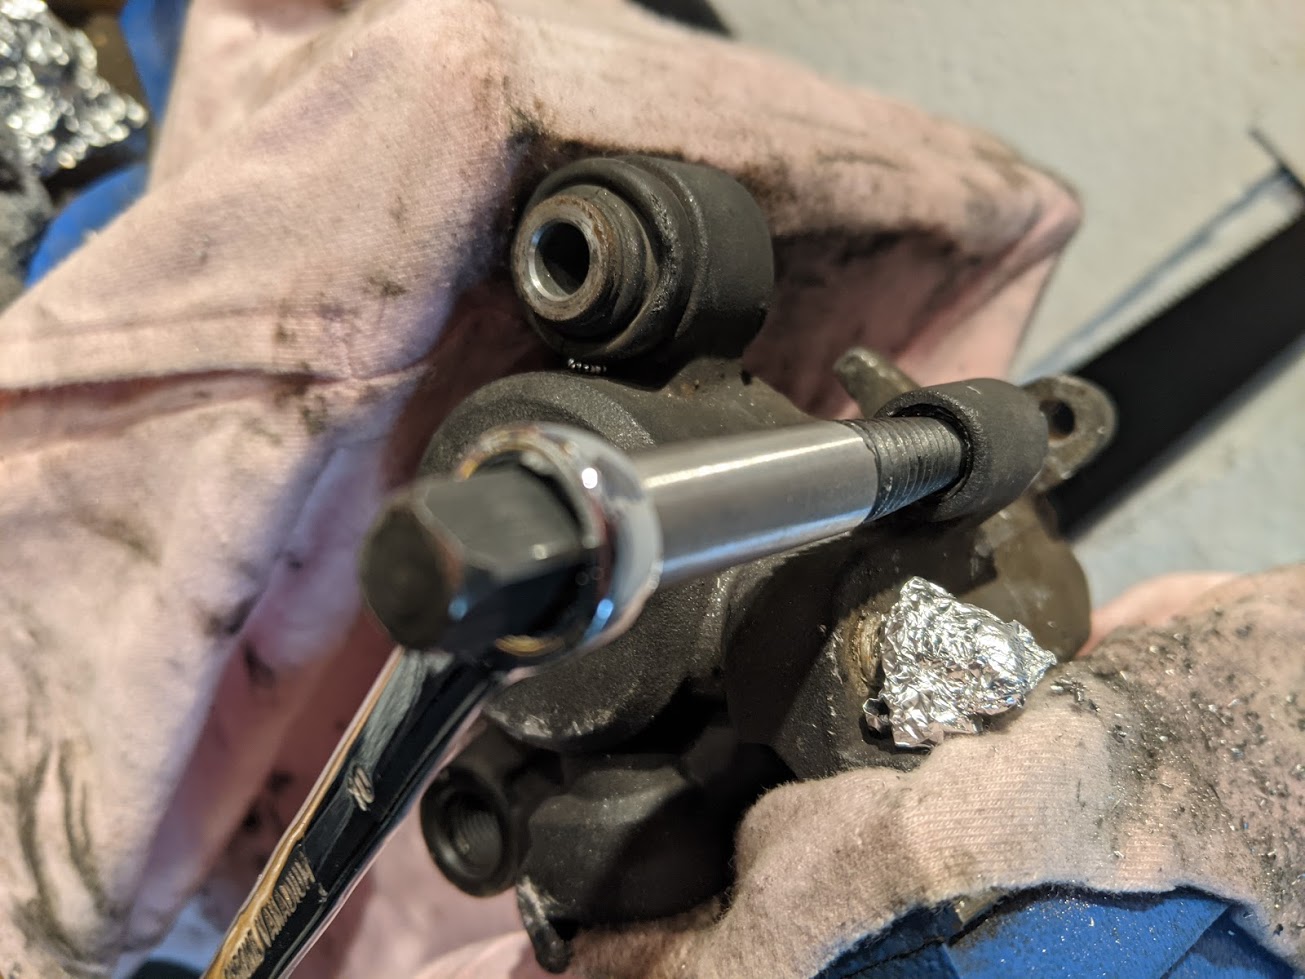
Tried getting it out with an impact driver and some anti-seize spray, but all I got for my effort was a rounded head. So, now I’m in an even worse position to get it out.
Tried grabbing the pin between the pads with some locking pliers and turning but doesn’t grip enough. Tried hammering in a torx bit, but looks like the ones I have are either too small or too big.
I hear welding in a hex key would be one way to do it, alas no welding kit.
Carefully drill it out taking care not to damage the threads in the caliper. When the head is mostly gone the pin should come free. The threads can then be cleaned out carefully.
Remove caliper allows pads more room to move and use a decent set of mole grips or a pipe wrench
Or for more room either cut the top of the hole inbthe pads out or cut a section from the non threaded end of pin to allow pads to slide offpin to give you more purchase
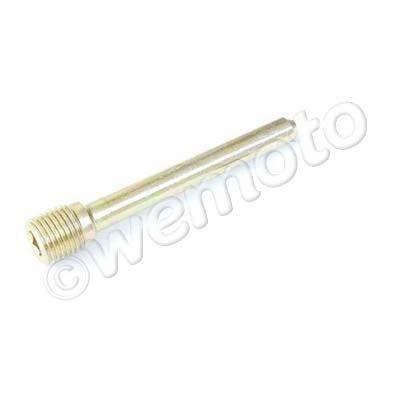
Brake pad pins should only be tightened to 15 to 20 Nm, clearly these are not who fitted them?
If I was a gambling man I’d wager some monkey boy fitted them using a high strength threadlock such as red Loctite 272 or similar. If that’s the case to disassembly apply localised heat to the threads and heat to around 250 °C, disassemble while hot. Localised heat can be applied by holding an Allen key in the pin head with a pair of grips and heating the Allen key shank with a blow torch. When the key shank starts to glow red that’s about 500 °C, not all that heat will transfer to the pin. Hopefully the heat will also cause the Allen key to expand enough to get some purchase on the rounded fastening head.
Don’t use a threadlock
Don’t overtighten them
Do use an anti-seize compound
As with any steel bolts into aluminium castings or casings give the threads a very light light smear of an anti-seize compound such as copper grease. This will provide insulation between the steel and aluminium reducing the risk of electron transfer and the two metals welding themselves together.
When you do get the pin out thoroughly clean and examine the threads in the caliper. If the threads are damaged its not the end of the World, a cheap as chips fleabay helicoil kit will be your best friend.
Push the pads apart to retract the piston, then use mole grips on the pin to twist it.
Maybe file two flat side on the pin to help.
I filed the top and bottom of the pin and tried with a variety of tools, but not getting enough grip so the tool just revolves around. Not sure if I should file it up more, don’t want to weaken the pin too much.
Carefully drill it out taking care not to damage the threads in the caliper. When the head is mostly gone the pin should come free. The threads can then be cleaned out carefully.
Seems like a last resort kind of thing, I’m unsure if I’ll be able to leave the threads intact. But I am running out of options now.
Or buy a second hand caliper…
Might have to go that way if nothing else works.
Brake pad pins should only be tightened to 15 to 20 Nm, clearly these are not who fitted them?
If I was a gambling man I’d wager some monkey boy fitted them using a high strength threadlock such as red Loctite 272 or similar. If that’s the case to disassembly apply localised heat to the threads and heat to around 250 °C, disassemble while hot. Localised heat can be applied by holding an Allen key in the pin head with a pair of grips and heating the Allen key shank with a blow torch. When the key shank starts to glow red that’s about 500 °C, not all that heat will transfer to the pin. Hopefully the heat will also cause the Allen key to expand enough to get some purchase on the rounded fastening head.
I was the monkey that tightened it (probably). I have a torque wrench, though I didn’t use for this specific pin since I never used much force to tighten it (it has a little cap that goes on top of it and holds it in place anyway, so seemed redundant). I definitely didn’t use any loctite. I do use copper grease on most bolts, I wonder if I forgot to use it in this instance. Although… I did change my rear tyre not too long ago, so a garage monkey might have been the last one to tighten it…
I tried to blowtorch an allen key which has some purchase inside the pin, but it doesn’t expand enough to grip it.
These worked for me when i had the same problem as you some time ago… they dont work all of the time ( have tried them for numerous stuck/broken bolts). Could be worth a try though
Dont forget to use a bit of anti seize on the thread of the new pins
These worked for me when i had the same problem as you some time ago… they dont work all of the time ( have tried them for numerous stuck/broken bolts). Could be worth a try though
I had the kit from when I used it a few years ago. Sadly, no luck either. The extractor goes in and gets a grip but the pin is proper stuck no movement at all.
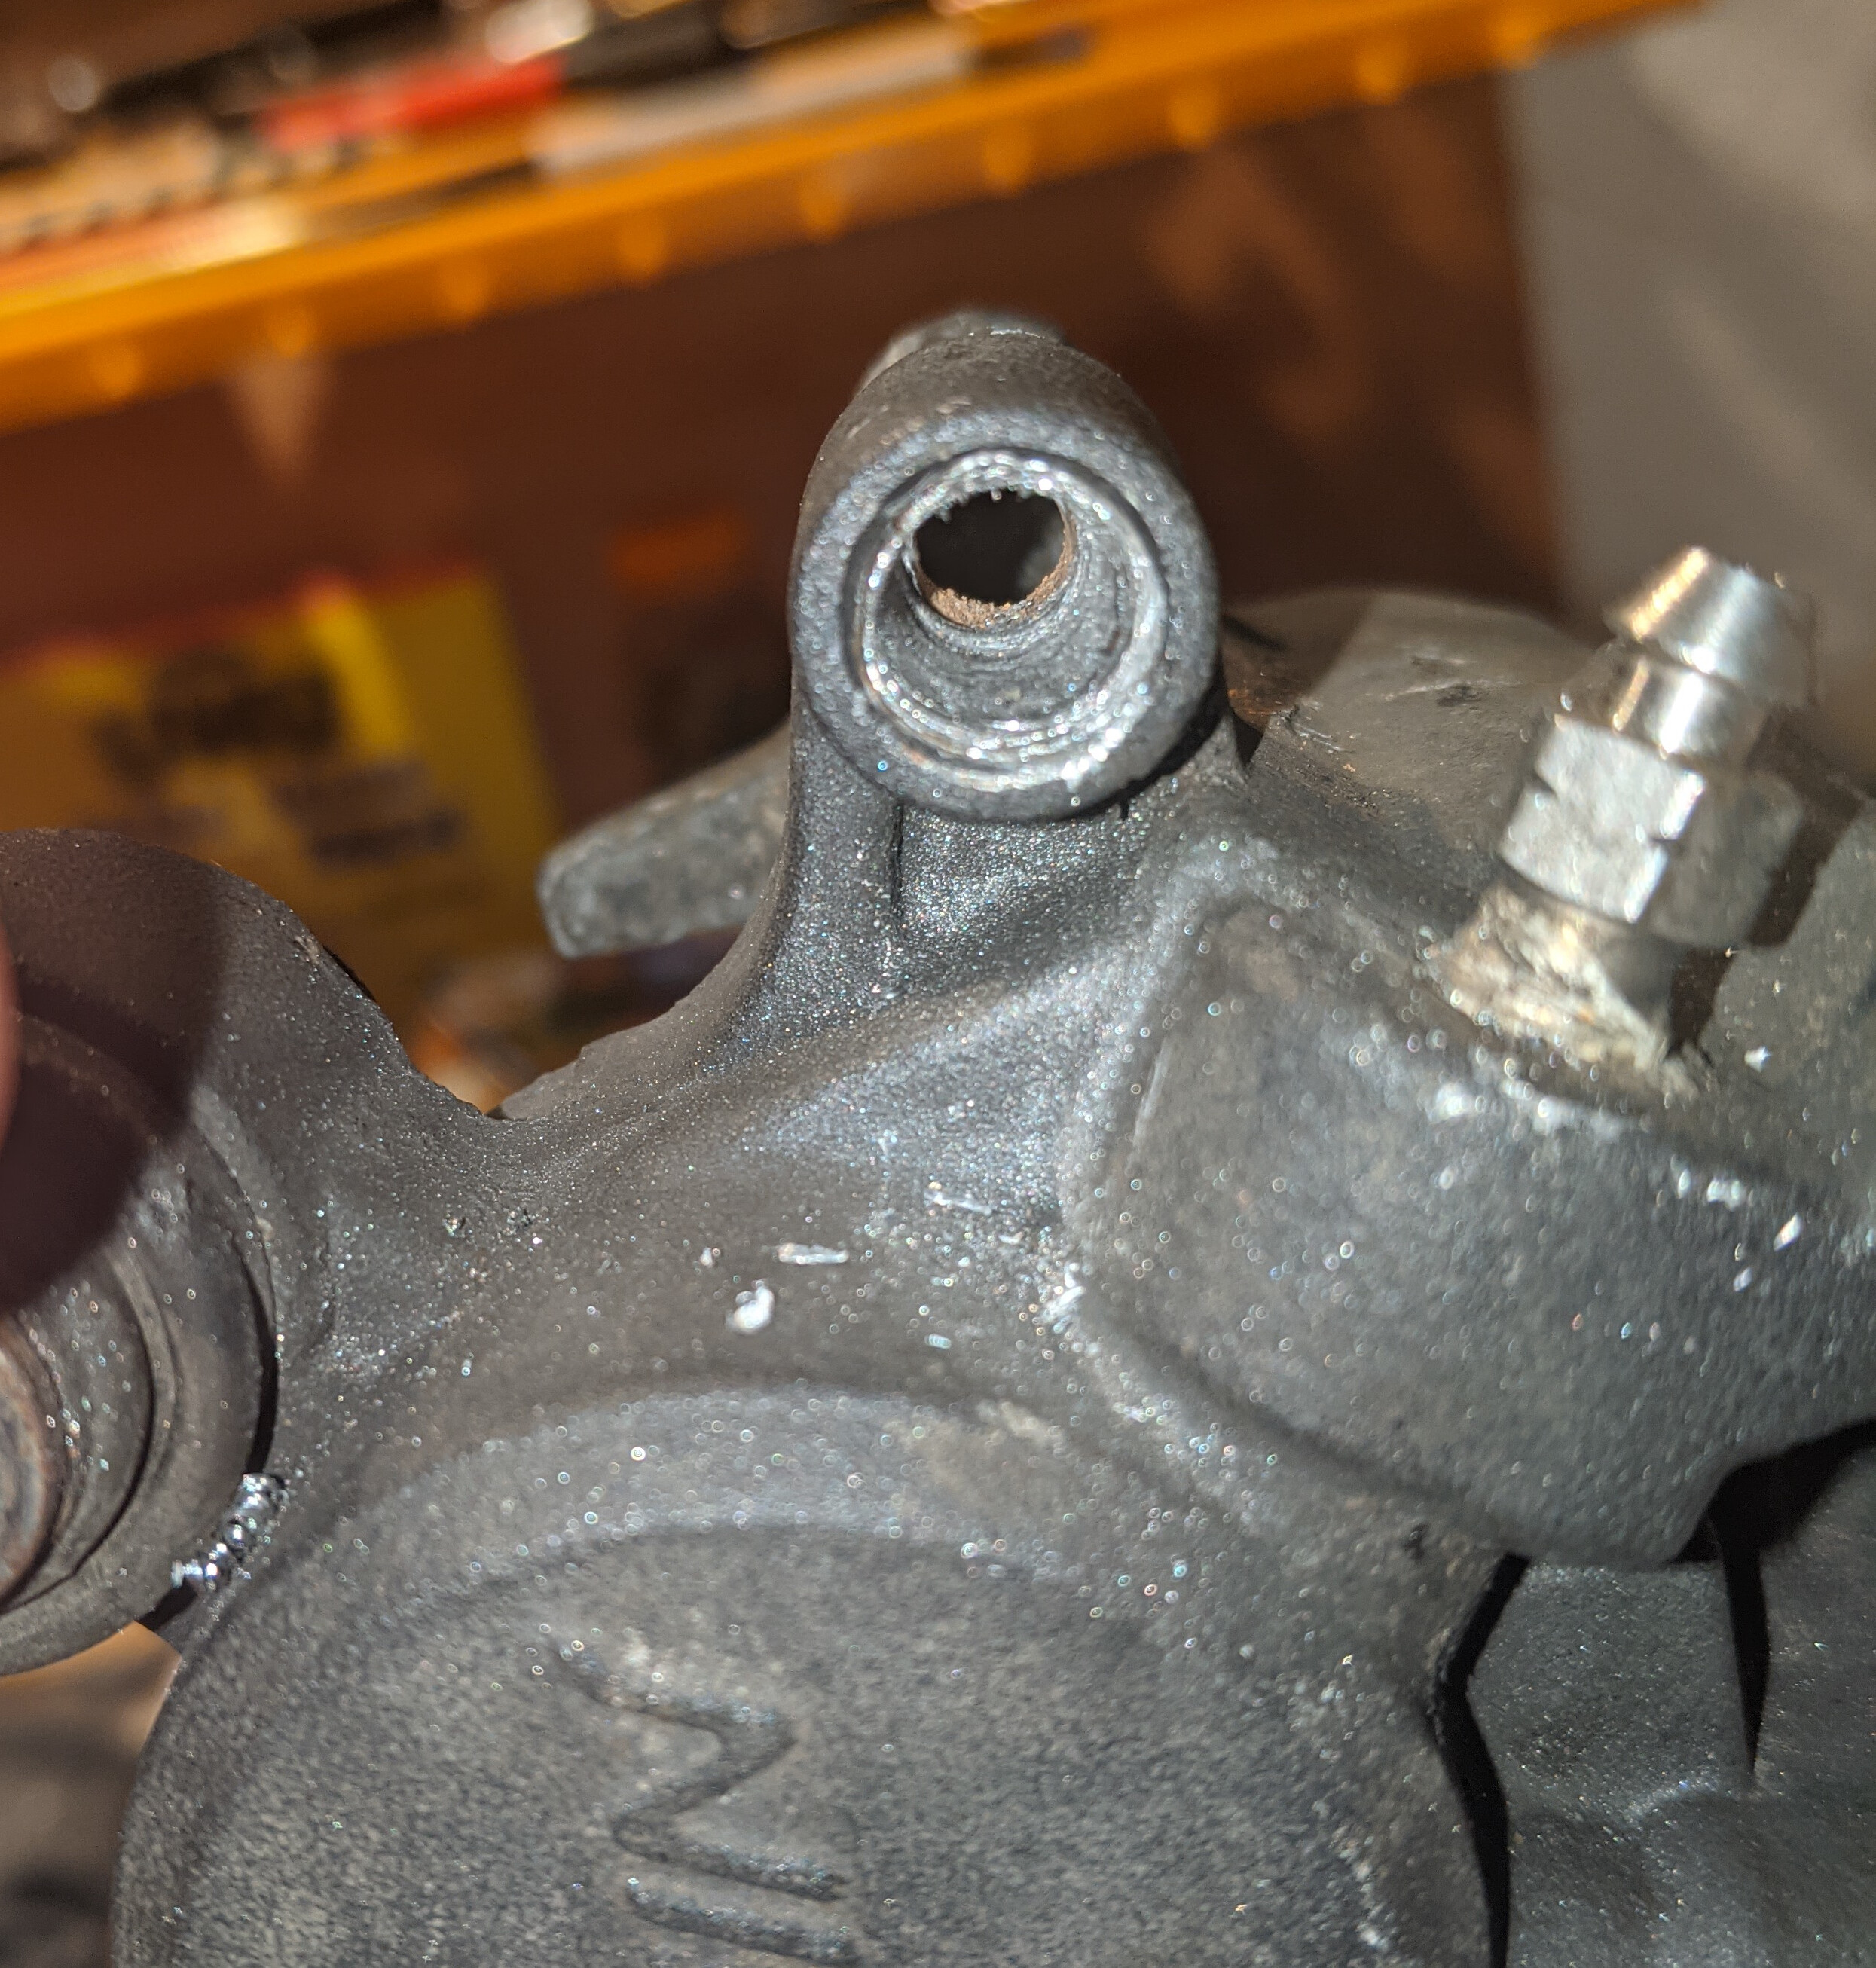
Currently trying to drill it out. I have about half a mm of the pin stuck to the thread, looks like this is as far as I’m getting with the drill, since the drill bits I have are either too small or too big. Any other way to get the shell of the pin from the thread?
So nearly there, looks nice and central. Can you get a drill bit one mil bigger? Once you clip the tips of the threads the remaining should/ could loosen.
Tried gently hammering in the extractor bit and turning anti-clockwise, but the extractor pops out after a quarter of a turn. The extractor bit gets progressively bigger starting from the tip, and at the very end it’s actually bigger than the brake pin itself, so maybe that’s why. The other extractor bits are way too small or big, though.
I’d have to buy one. The ones I have are too big and will obliterate the thread completely. And, if I’m going to buy one, might as well buy one of those helicoil kits @National_Treasure mentioned.
Just be be mindful the helicoil requires you drill the existing thread out by +0.5 mm. The helicoil instructions tell you to fit the helicoil dry, I fit the helicoil with a thread lock such as blue medium strength Loctite 243, just leave it 24 hours to cure before fitting the pin to ensure the threadlock doesn’t lock the pin too.
If you’re worried about the strength of the helicoil repair the last one I fitted was to a gear lever pivot and that’s stood the test of time, 4 years and 20,000 mile.
Read the full sentence in conjunction with the helicoil instructions
The helicoil instructions tell you to fit the helicoil dry, I fit the helicoil with a thread lock such as blue medium strength Loctite 243, just leave it 24 hours to cure before fitting the pin to ensure the threadlock doesn’t lock the pin too.
Idiots guide below
Drill out damaged thread with supplied drill
Tap re-drilled hole using supplied tap
Load helicoil insert into supplied applicator Apply thread lock such as blue medium strength Loctite 243 to helicoil- National Treasure
Screw helicoil into tapped thread
Using supplied tag breaking tool break off tag insert Leave 24 hours for threadlock to fully cure before use - National Treasure
Thread is repaired
Yes, get the helicoil kit that includes the drill, other tooling and costs around £10 on fleabay. It will include everything you need - drill bit, tap, helicoil insert tool, multi tool for use with tap & helicoil, tag breaking tool, helicoils and instructions (see above too).
I’d describe the quality of these kits as ‘home mechanic use’. The last kit I got was supplied with all the necessary tooling and 20 helicoils. I’d imagine the tooling would be past best halfway through the helicoils but if it only lasts for one helicoil its a cheap as chips solution.