ok guys…after the mishap of leister square,i finally got hold of me crash bobbins …has anybody fitted them themselves?..ive read the instructions but im faraid i’ll balls it up…
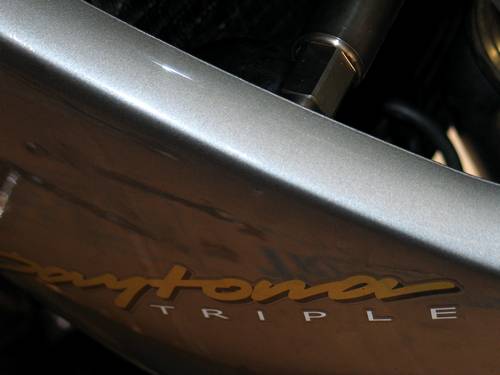
its on a k6 750 and some drilling of the fairing is required…
Agree with Stan, I needed to drill both my side pannel’s. Take plenty of time, dont rush the drilling and check your pilot holes well. 9/10 times if the pilot holes off when you come to drill the main hole it will cover up the pilot hole.
you know it cezar…they came in from order today…seems R&G have been doing a bit of overtime as the bobbins for the k6 are most sort after…i think its becouse the 600 & 750 have the same frame…hence…double the sales…
but thanks for the advise guy’s will have to take my time and plan everything out well before fitting…one thing that i may have overlooked tho…or havent yet seen…no tourqe settings for the bolts…hmmm any idea’s?
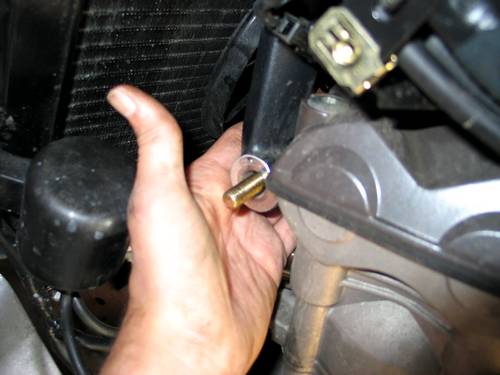
Smiled, when I put these in I remove the fairing panels. Undo the original bolt on the bike where the bobbin is going to go (quite often they have threadlock on them). Insert the new bolt. Offer up the fairing panel to make sure you have things in line. Put a large blob of Tippex on the end of the bolt and while it is still wet press the panel against it. The inside of the fairing panel is marked by the tipex and then you know exactly where to drill. Make sure that the hole you cut is slightly larger than the crash bung.
As for torque settings, if its the engine bolts that you are removing then you will need to check the manufacturers spec on the torque settings for the engine bolts. Cant tell you what it is, I just do mine up by hand myself, nice and tight.
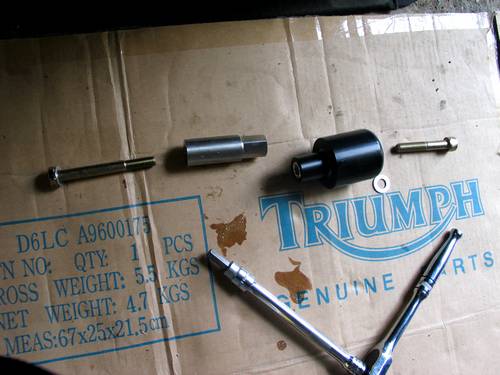
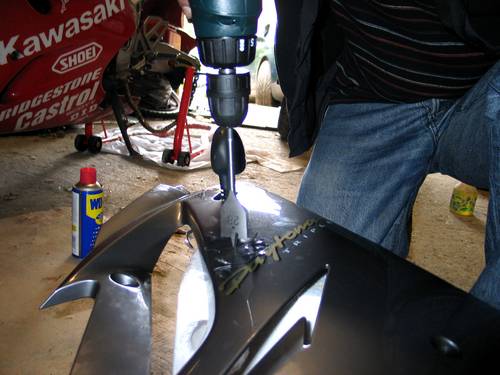
First, the bits involved. not shown is the pointy threaded bolt that is used in place of tippex (re Chuffster ) to mark the fairing prior to drilling.
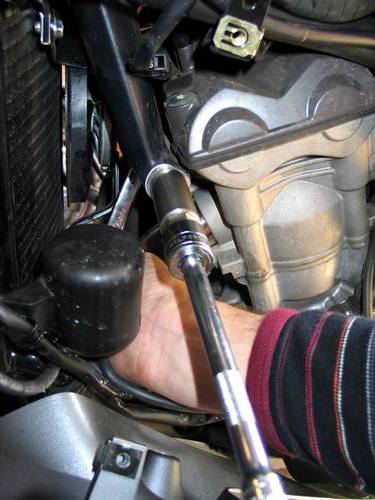
Second, the engine bolt taken out. Make sure you have the correct socket/extender bar etc before putting the bike on stands, taking all the fairings off etc and then needing to ride to Halfords etc…
Third, R&G engine bolt going on, noting spanner held at rear to hold nut still while tightening bolt.
(Poxy bleedin’ uploader shuffled them dammit. Hope you can tell which is which. If not, go to dealer LoL )
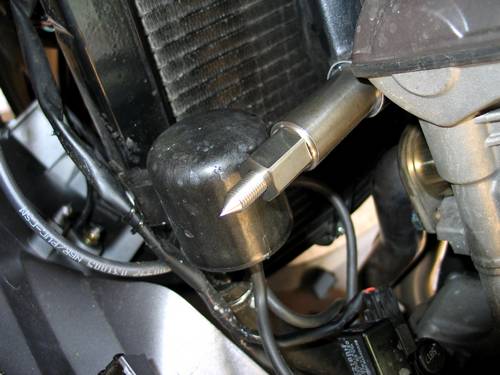
Then fairing removed and drilled. Put tape around area to minimise drill skittering around, and I drilled from the front as it ensures a clean cut on the visible side. Perhaps you could cut from the back, but I think there is a danger of paint flaking or plastic chipping as the drill breaks through.
Then tidy up the hole with a bit of sandpaper, and always buy a bigger drillbit than needed esp if any curves are cut through, If the fairing ends up touching the bung, it may chip paint etc.
I painted mine with some grey enamel (yes, Humbrol model paint) to disguise the white plastic of the fairing.
Then take out the pointy bit, and install the fairing. Keeping fingers crossed, put the bolt throught the bung, not forgetting the washer, and it should screw home perfectly.
it was like being at the dentist…but finally did it…can you give a little inspection at the bridge as i feel it went a little too well…i followed your discription to the letter mate and the pics really helped loads…
so now i have me own bungs on the k6…fitted by mwaaa!!!..altho…the bungs i have fitted differd to the ones that you have and only needed drilling on one side…
also…i ajusted my rear sets strait after to one notch higher…and one notch back…feels lovley…!!!
arnt i the little tinker’er!!!
thanks once again to the others that awnserd my plight!!!