So a while back I bought a rusty old go kart frame to get the step son in to engineering/mechanics as he loves motorsport and cars so what better way to use the new workshop and have some good bonding time.
Decided on electric rather then small engine as to not annoy the neighbours when he’s messing about in the garden/drive
Have finally ordered all the parts and should be arriving in next few weeks and I have 12 days off over Xmas so plenty to keep us going
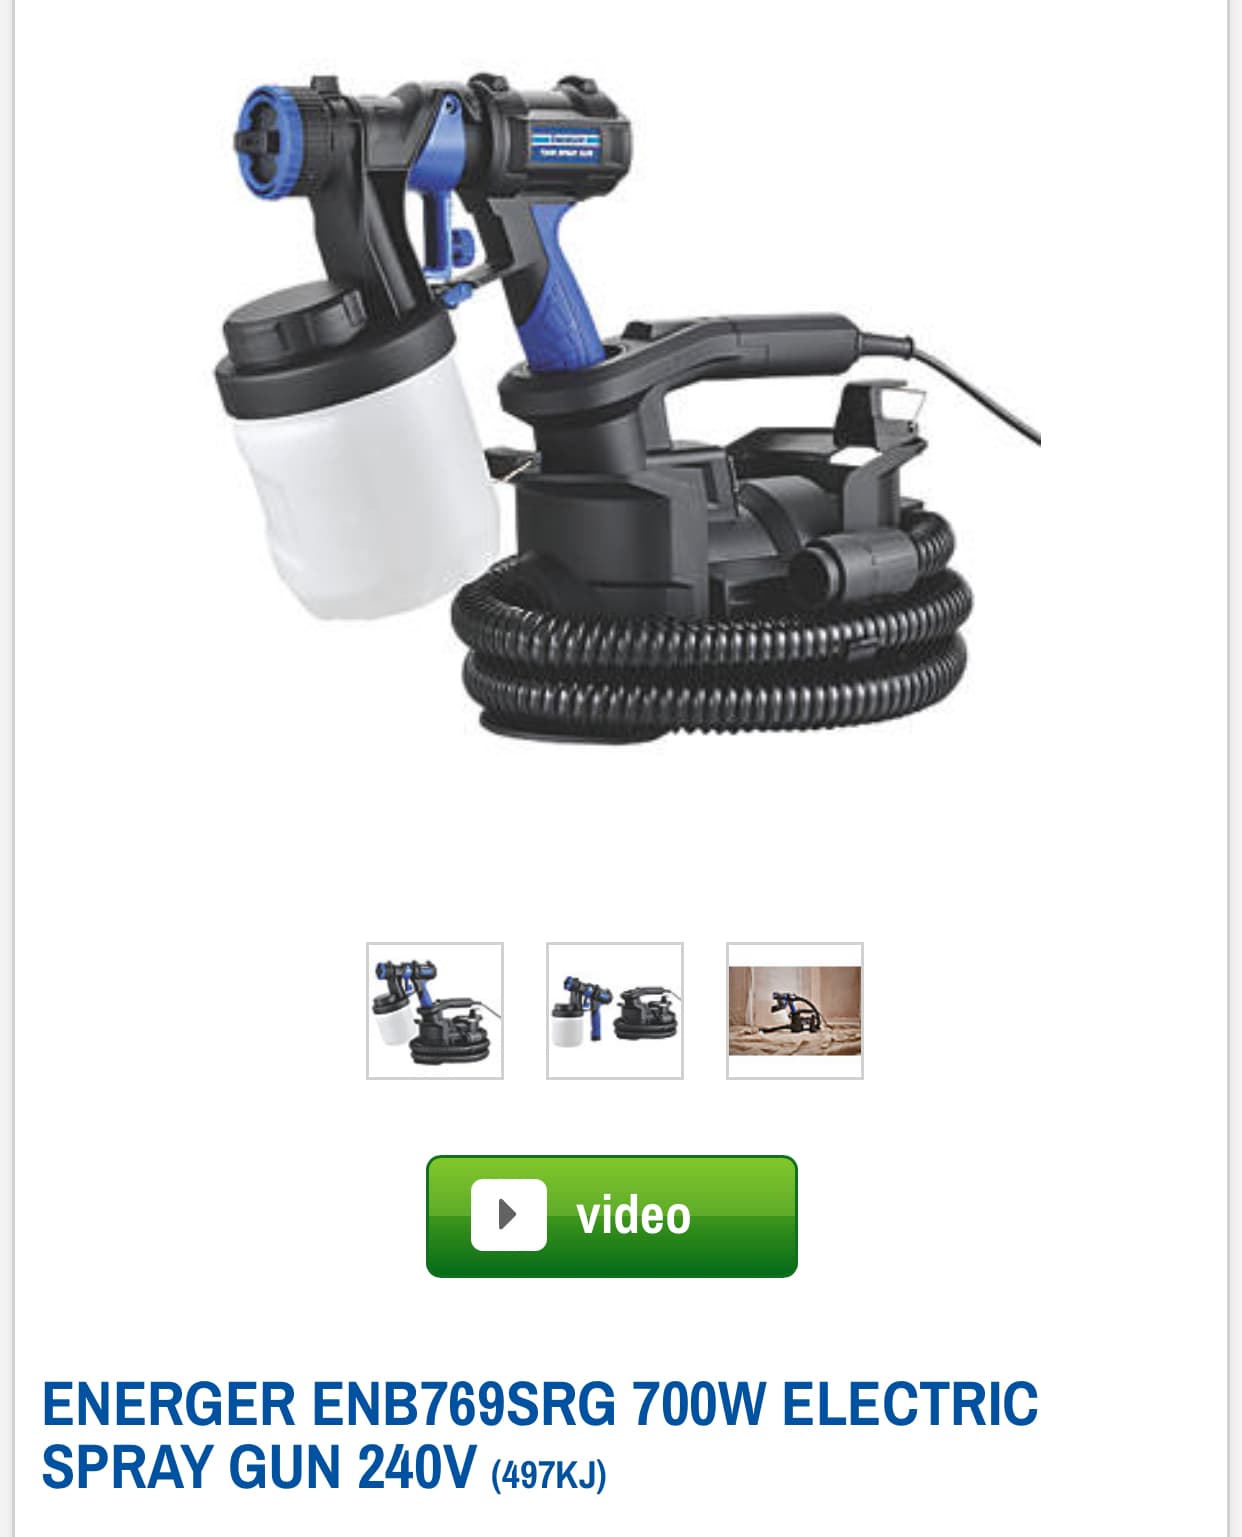
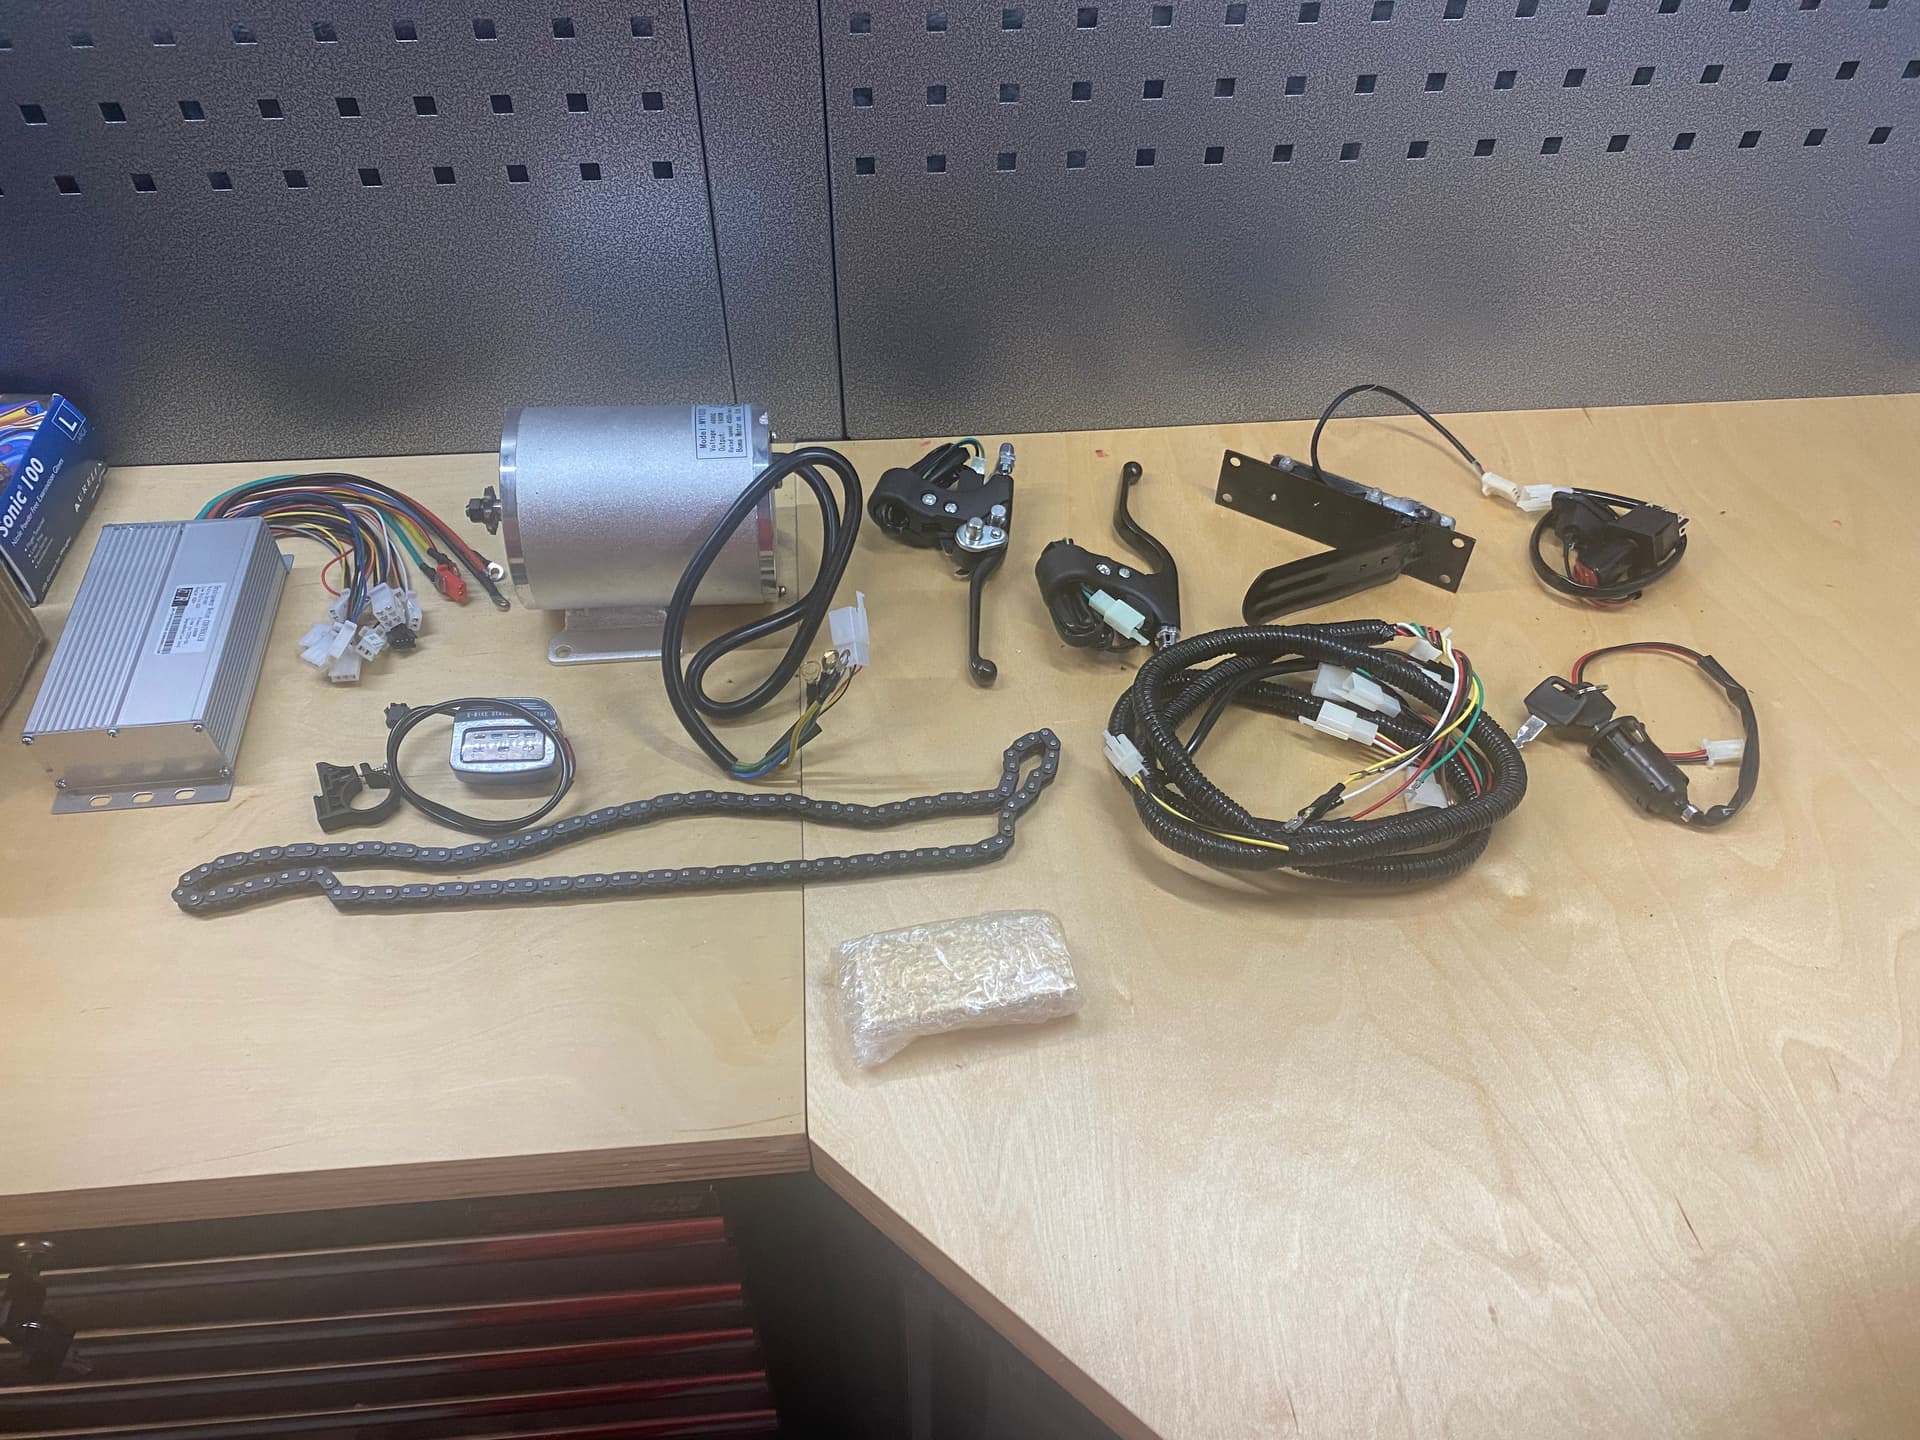
The motor is a 1800W 48v with forward and reverse functions so depending on final weight should give it some oooomph
First job is going to be cleaning the frame up and then turning the workshop into a DIY spray booth…Watch this space
My Son embarked on the same some years ago but the parts just were’nt readily available as they are now. He went down the Rotax 2stroke route. You’ll both have great fun!
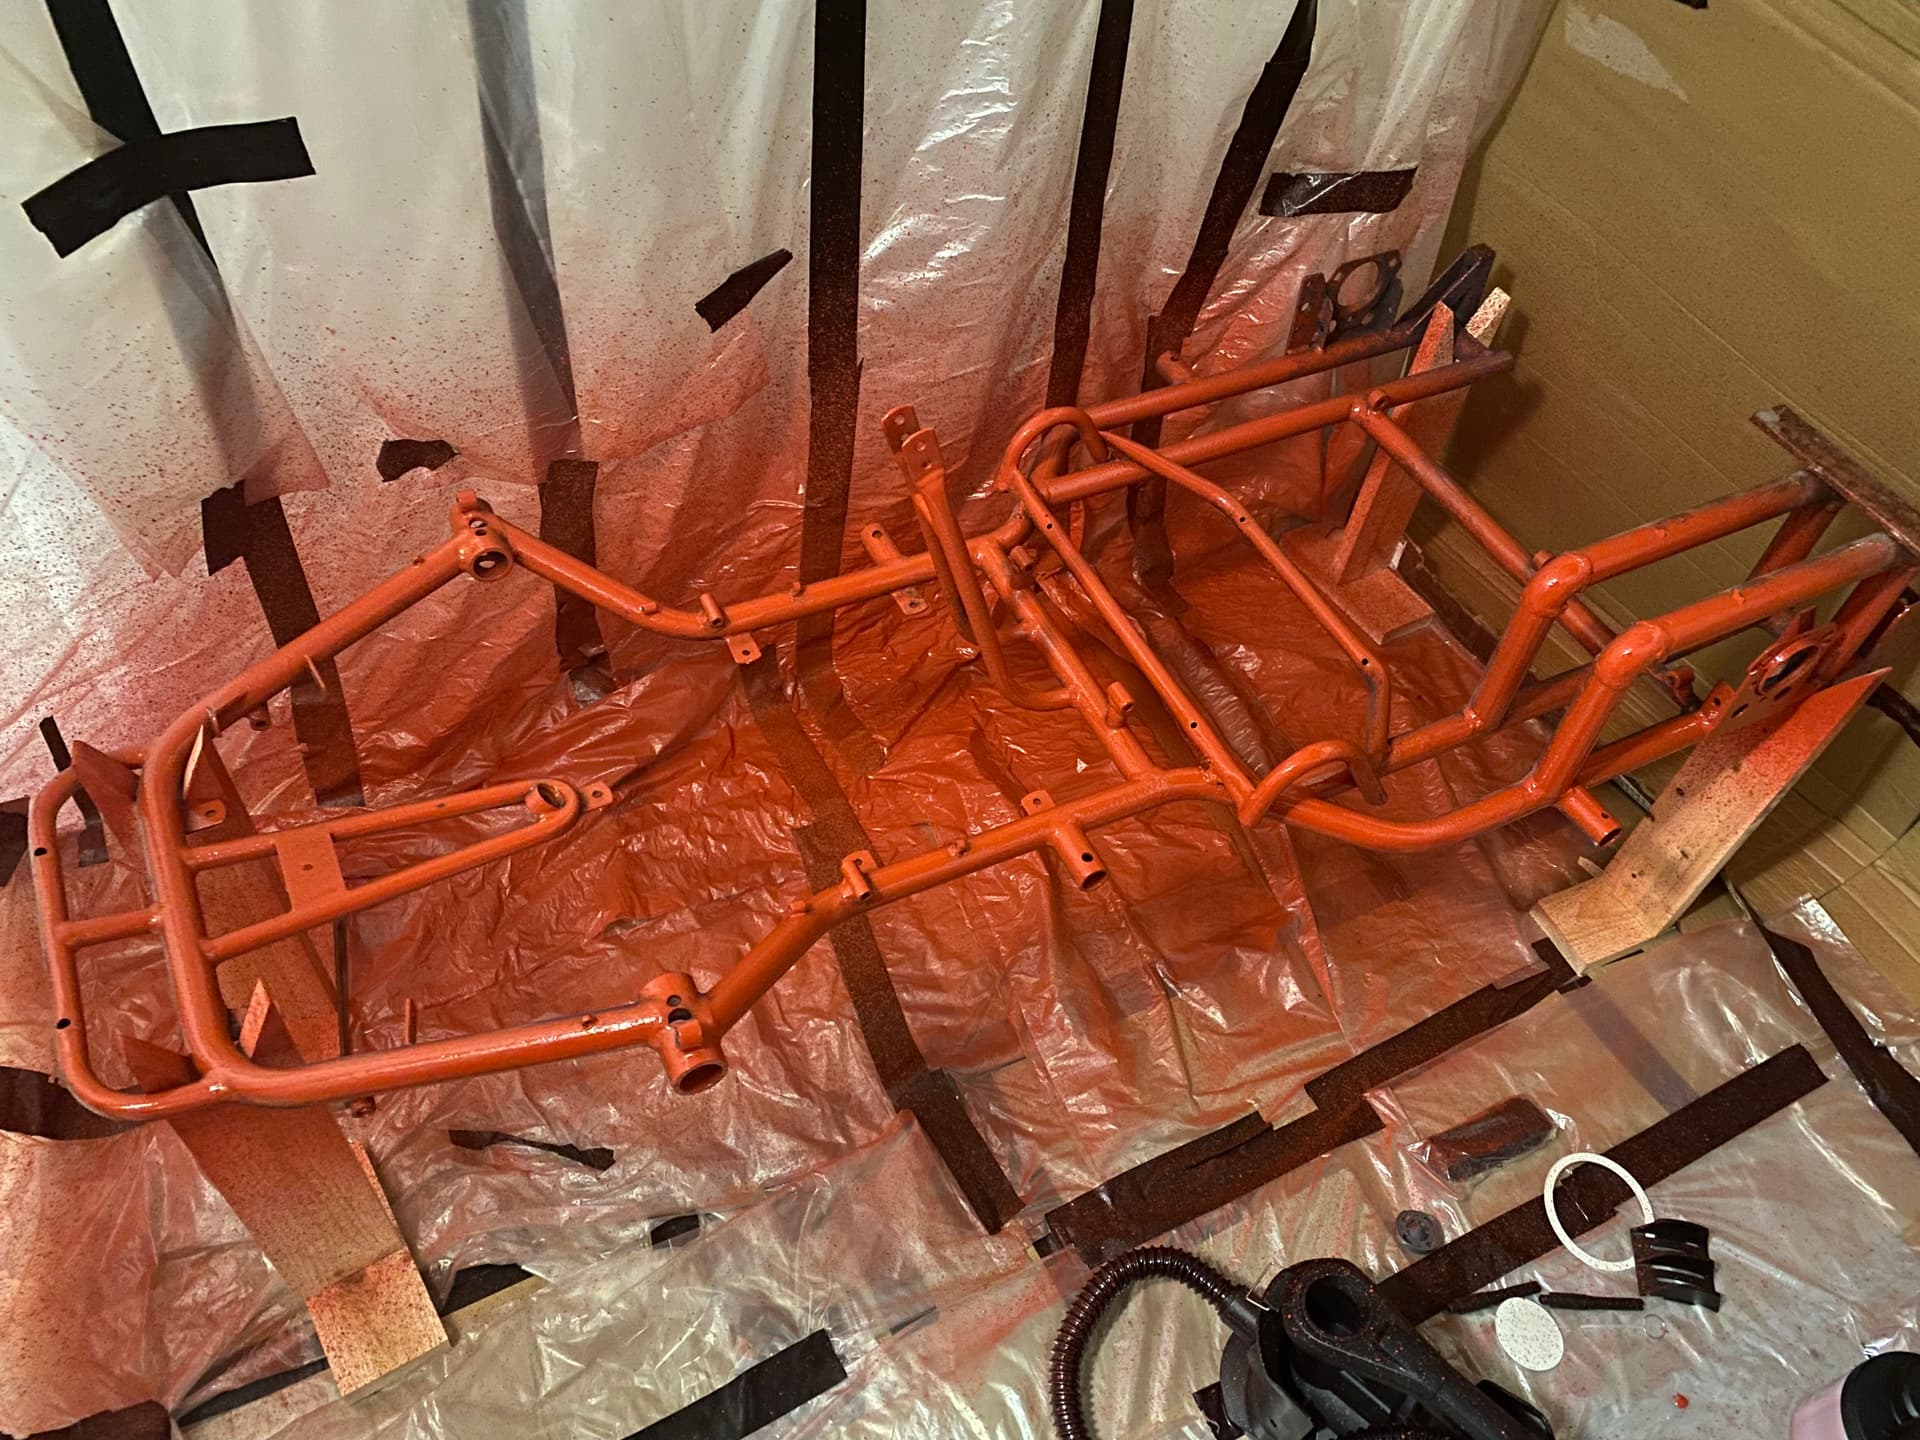
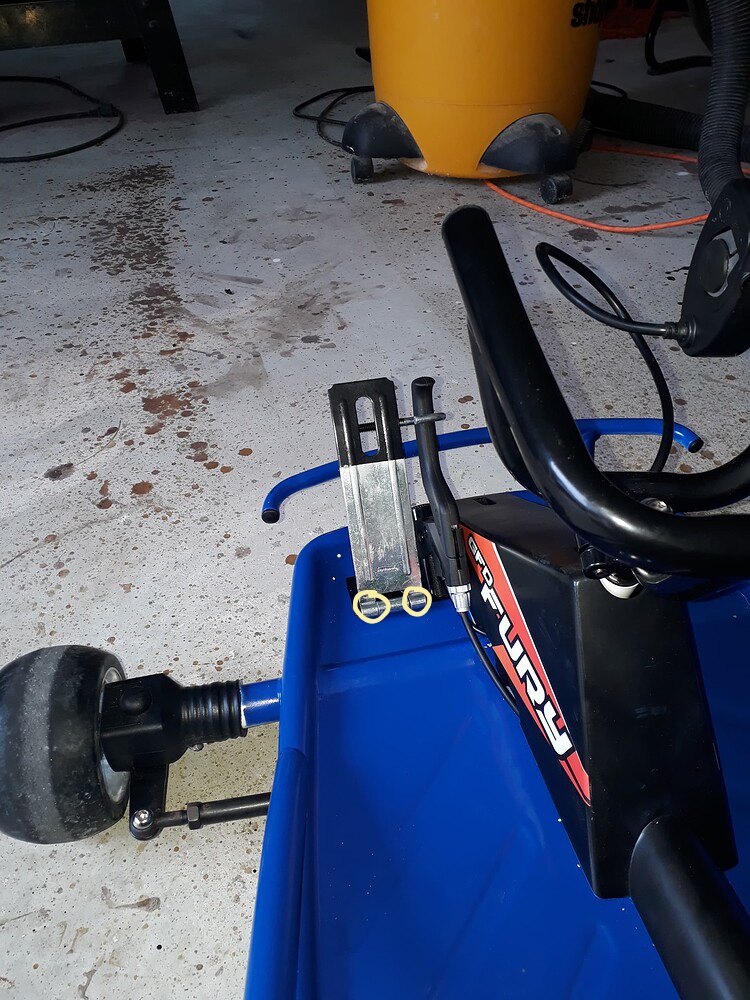
So have spent the last few days sanding down the frame and removing all the old rusty bolts, wheel and axle, swearing lots and building a temporary spray booth in the workshop.
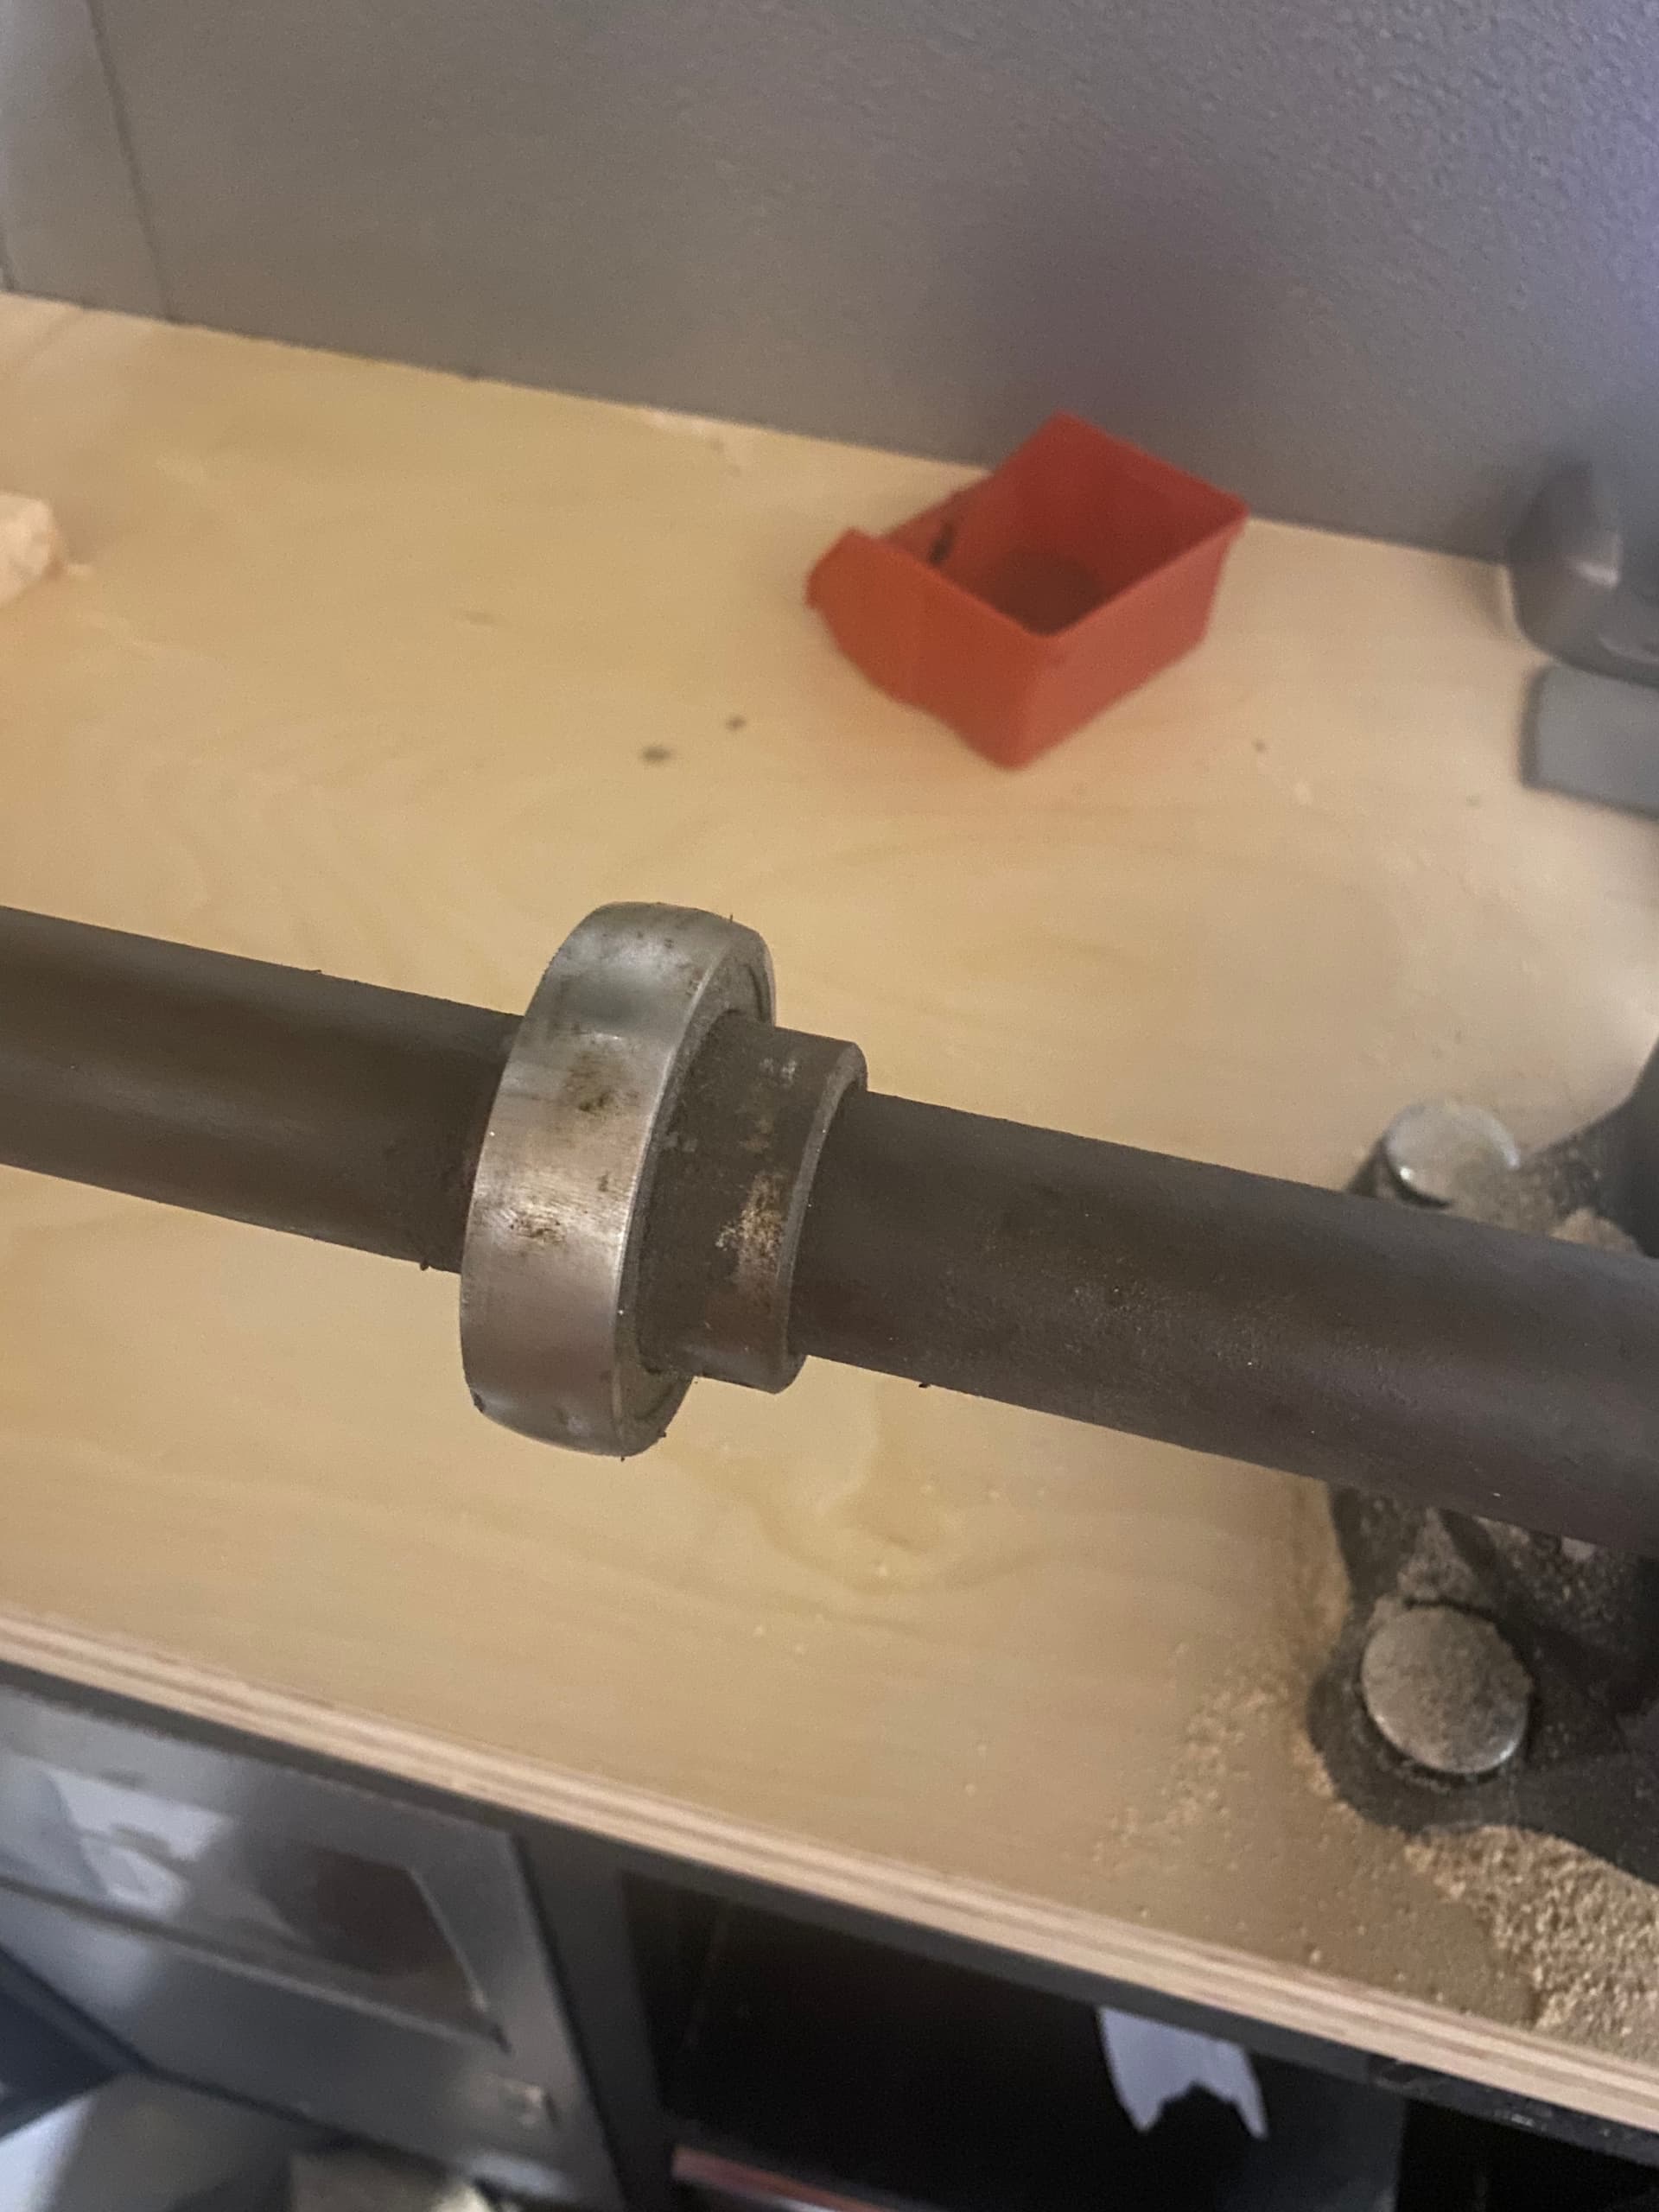
No amount of heat, release spray or hammer action could free the axle from the frame and given the level of corrosion on it decided to cut it out with the angle grinder, i fear there was probably some sort of retaining pin but at a loss trying to find it
Will post up some pic’s soon
Tomorrows job is to spray the frame then start muddling through the electrical components and looking at building the wiring harness
Some karters used to use a double grub screw as a failsafe .
Look at a better hinge type for your pedal as that one will bend out over time where the metal is rolled around the pin ( or at least weld the gap up )